Quinoa Crunch Peanut Butter Cups Recipe
Introduction
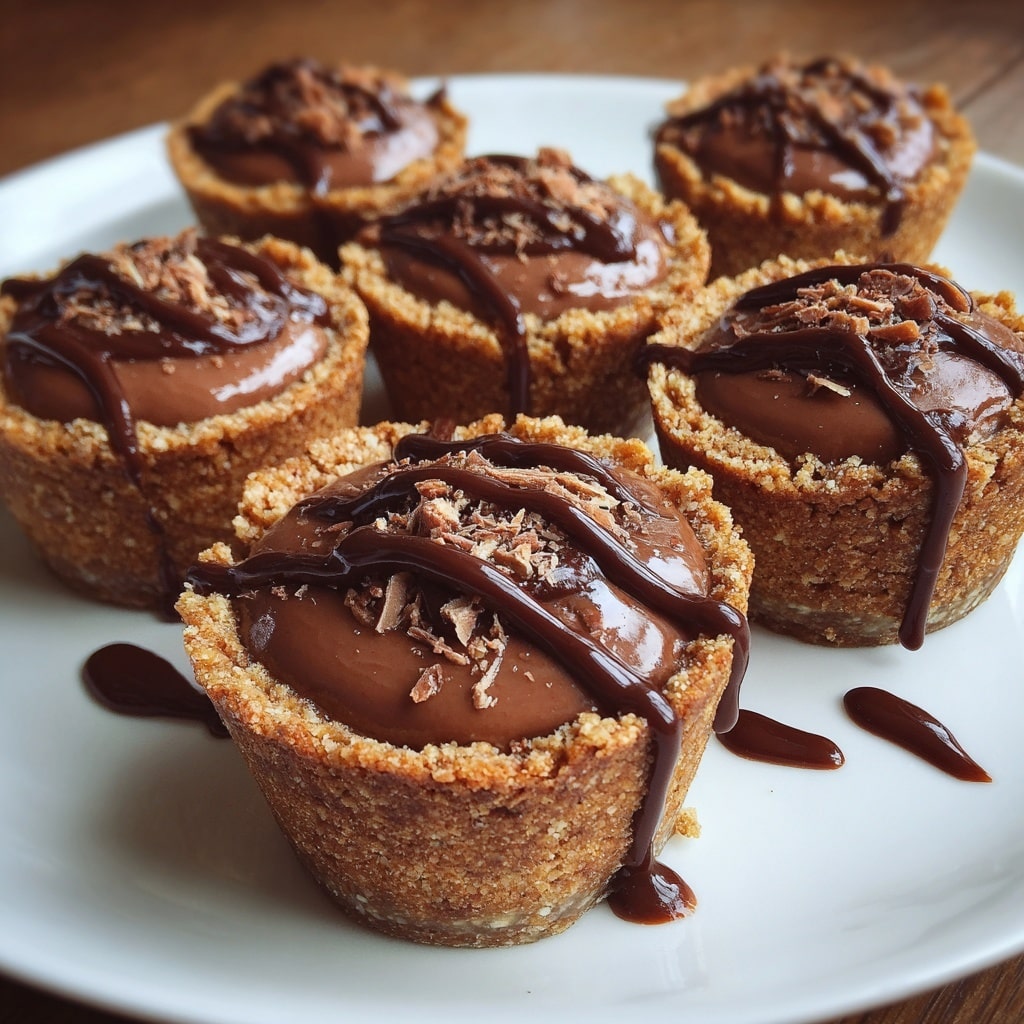
Quinoa Crunch Peanut Butter Cups are a delicious twist on classic peanut butter treats, adding a satisfying crunch with quinoa crisps. These homemade cups combine smooth chocolate and creamy peanut butter filling for a perfect sweet and salty snack.
Ingredients
- 1 cup dark chocolate
- 1 tbsp coconut oil
- 2 tbsp peanut butter (for chocolate layer)
- 3 tbsp quinoa crisps
- 1/3 cup peanut butter (for filling)
- 1 tbsp maple syrup
- 1 tbsp coconut flour
Instructions
- Step 1: Add dark chocolate and coconut oil to a medium bowl. Microwave in 30-second increments, stirring well between each, until the chocolate is smooth and creamy.
- Step 2: Mix in 2 tablespoons of peanut butter and quinoa crisps to the melted chocolate. Set this mixture aside.
- Step 3: In a small bowl, combine 1/3 cup peanut butter with maple syrup.
- Step 4: Gently fold in the coconut flour until the peanut butter mixture starts to thicken.
- Step 5: Spoon about 1/2 tablespoon of the chocolate mixture into each silicone cupcake liner.
- Step 6: Roll 1 teaspoon of the peanut butter filling into a ball, then gently flatten it. Place it in the center of each liner, avoiding the sides.
- Step 7: Cover the filling with more chocolate mixture, then freeze the cups until they are completely firm.
- Step 8: Once firm, remove the peanut butter cups from the liners and enjoy your crunchy, chocolaty treat!
Tips & Variations
- Use peanut butter without added sugar or oils for a cleaner flavor.
- Swap quinoa crisps with puffed rice or crushed nuts for a different crunch.
- For a vegan option, ensure the chocolate and peanut butter used are dairy-free.
- Adding a pinch of sea salt on top before freezing enhances the chocolate and peanut butter flavors.
Storage
Store the peanut butter cups in an airtight container in the freezer for up to 2 weeks. When ready to eat, let them sit at room temperature for a few minutes to soften slightly before enjoying.
How to Serve
Serve this delicious recipe with your favorite sides.
FAQs
Can I use regular cupcake liners instead of silicone?
Yes, but silicone liners make it easier to remove the frozen cups without breaking. If using paper liners, chill the cups well and handle gently to avoid cracks.
Is coconut flour necessary in the peanut butter filling?
The coconut flour helps thicken the peanut butter filling to keep its shape. You can substitute it with almond flour or omit it, but the filling may be softer and harder to handle.
PrintQuinoa Crunch Peanut Butter Cups Recipe

These Quinoa Crunch Peanut Butter Cups are a delightful twist on the classic treat, combining a rich dark chocolate layer with crunchy quinoa crisps and a creamy, naturally sweetened peanut butter filling. Perfect for a guilt-free indulgence that’s easy to make and freezer-friendly.
- Prep Time: 10 minutes
- Cook Time: 5 minutes
- Total Time: 2 hours 15 minutes (including freezing time)
- Yield: 12 peanut butter cups 1x
- Category: Dessert
- Method: No-Cook
- Cuisine: American
- Diet: Vegetarian
Ingredients
Chocolate Layer
- 1 cup dark chocolate
- 1 tbsp coconut oil
- 2 tbsp peanut butter
- 3 tbsp quinoa crisps
Peanut Butter Filling
- 1/3 cup peanut butter
- 1 tbsp maple syrup
- 1 tbsp coconut flour
Instructions
- Melt the Chocolate: Start by adding the dark chocolate and coconut oil to a medium microwave-safe bowl. Heat in 30-second increments, stirring thoroughly between each until the chocolate is smooth and creamy.
- Prepare Chocolate Mixture: Mix in 2 tablespoons of peanut butter and 3 tablespoons of quinoa crisps into the melted chocolate. Set this aside for later use.
- Make the Peanut Butter Filling: In a small bowl, combine 1/3 cup peanut butter with 1 tablespoon maple syrup. Then gently fold in 1 tablespoon coconut flour until the mixture thickens to a workable consistency.
- Assemble the Cups: Spoon about 1/2 tablespoon of the chocolate mixture into the bottom of silicone cupcake liners. Next, roll 1 teaspoon of the peanut butter filling into a ball and flatten it slightly. Place this in the center of each chocolate base, ensuring it does not touch the sides.
- Top and Freeze: Cover the peanut butter filling with the remaining chocolate mixture to form the top layer. Place the liners in the freezer and allow the cups to firm up completely, typically for at least 1 to 2 hours.
- Serve: Once fully set, remove the peanut butter cups from the silicone liners and enjoy immediately or store them chilled for later.
Notes
- Use silicone cupcake liners for easy removal without breaking.
- Dark chocolate with a high cocoa percentage enhances flavor and adds antioxidants.
- Freeze until firm to maintain shape and texture.
- Variations: Substitute peanut butter with almond or cashew butter for different nutty flavors.
- Store leftovers in an airtight container in the refrigerator for up to one week.
Keywords: quinoa peanut butter cups, healthy peanut butter cups, no-bake chocolate peanut butter dessert, quinoa crisps dessert, gluten-free peanut butter cups